DIY fermentation adds a healthy boost of flavor.
Translated from Old French as “sour wine,” vinegar’s name hints at its origin story. Though touted in recent years as a piquant culinary trend, vinegar has served as a food staple and preservative since as early as 5,000 B.C., when the Babylonians relied on vinegar to preserve food transported over vast distances.
Two-Step Toward Health
Vinegar is made through a two-step fermentation process: sugar to alcohol, then to acetic acid. Health benefits attributed to acetic acid include the lowering of blood sugar and reduction of inflammation.
“Whether it’s summer apple cider vinegar (ACV) and lemonade tonic or a winter wellness ACV ginger tea, the acetic acid in ACV is both flavorful and therapeutic,” says Reno holistic nutritionist Carly Neubert. “The benefits of making your own vinegar are twofold: flavor options and probiotics.”
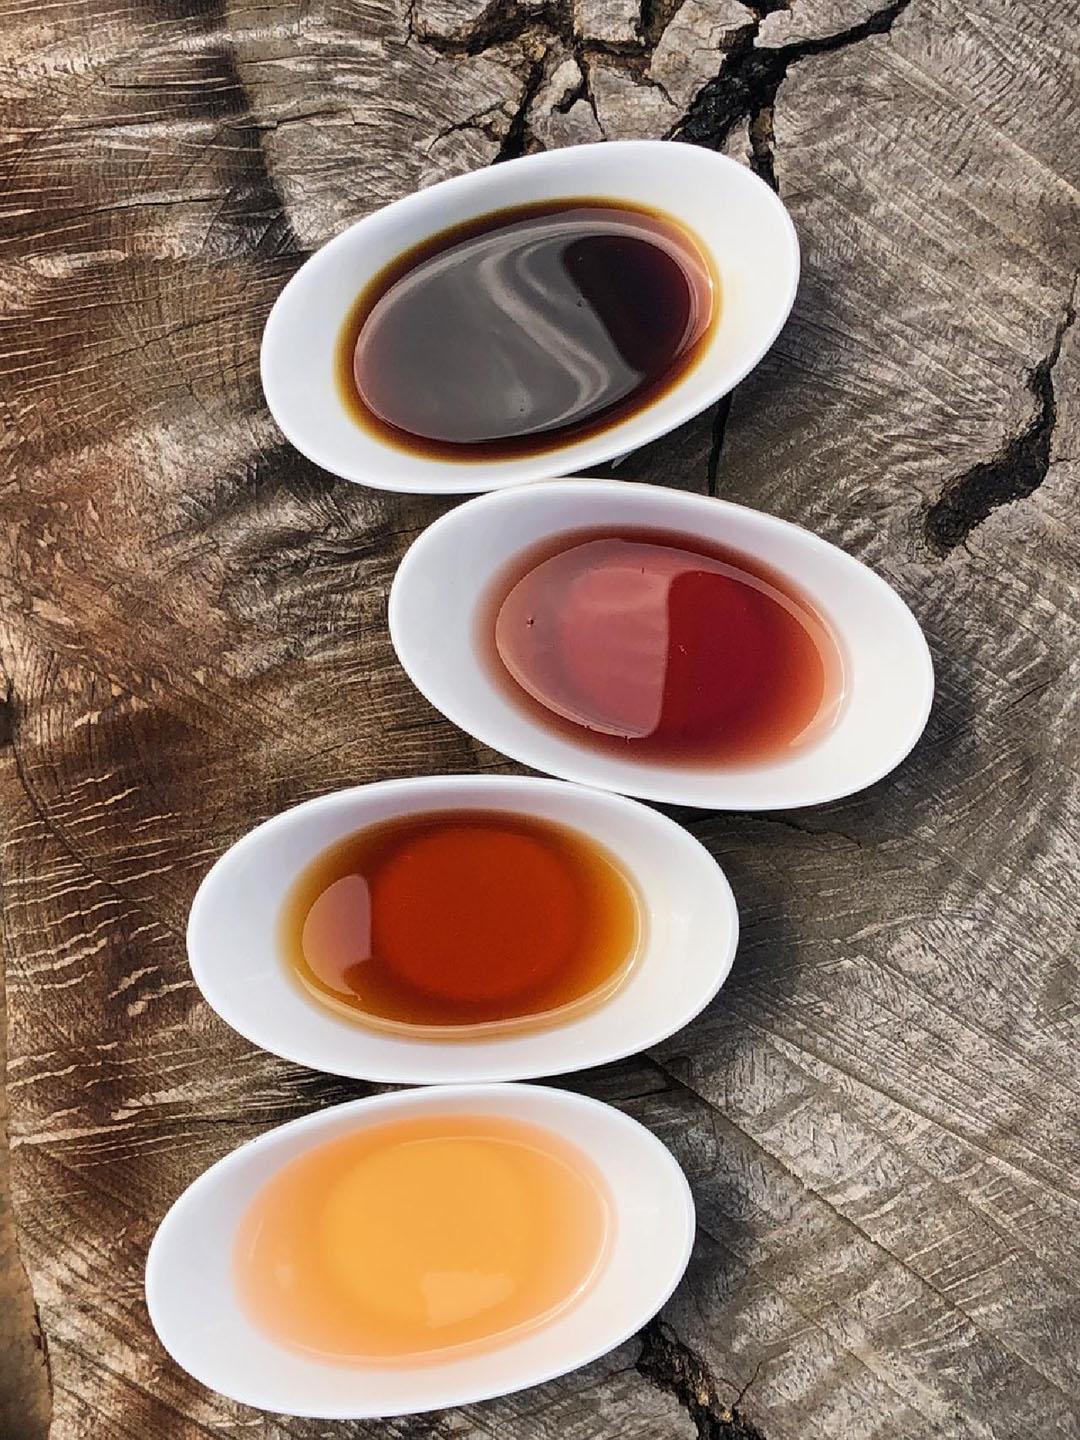
ACV and balsamic vinegars both contain antioxidants, prebiotics, and phytonutrients. Unfortunately, many store-bought vinegars lose their probiotics during the heat-pasteurization process.
To those new to fermentation, making vinegar may seem like concocting a potion or performing a complex science experiment. But it’s actually simpler than you might think.
Kirsten Shockey, co-founder of The Fermentation School, an online fermentation education school, advises that vinegar-making is an excellent first step into the world of fermentation. She suggests beginners “start with the alcohol — so opening a bottle of wine or hard cider and pouring it into a wide-mouth jar for oxygen and stirring it often.”
Stirring daily oxygenates the entire liquid, which benefits the acetic acid bacteria and drowns the kahm yeast, an aerobic yeast that forms when the sugar is used up and the pH of the fermented liquid drops. Left unchecked, the kahm yeast outcompetes acetic acid bacteria, which will prevent the vinegar from forming.

As chef and food scientist Jori Jayne Emde explains, “If you have a base understanding of what’s going on in your jar, you’ll have more confidence with the process.”
No Mother, No Problem
“Contrary to popular belief, not all vinegars form mothers, nor do you need an actual mother to make vinegar. So if you don’t have one, don’t fret if one doesn’t form; it doesn’t mean your vinegar isn’t happening,” Shockey advises.
Emde offers a few final words of advice: “Trust your nose to chart your progress, and, most of all, don’t be afraid to fail!”
Freelance writer Susan Winters plans to concoct her own vinegar as soon as she has some wine left over.
SIDEBAR
Apple Cider Vinegar
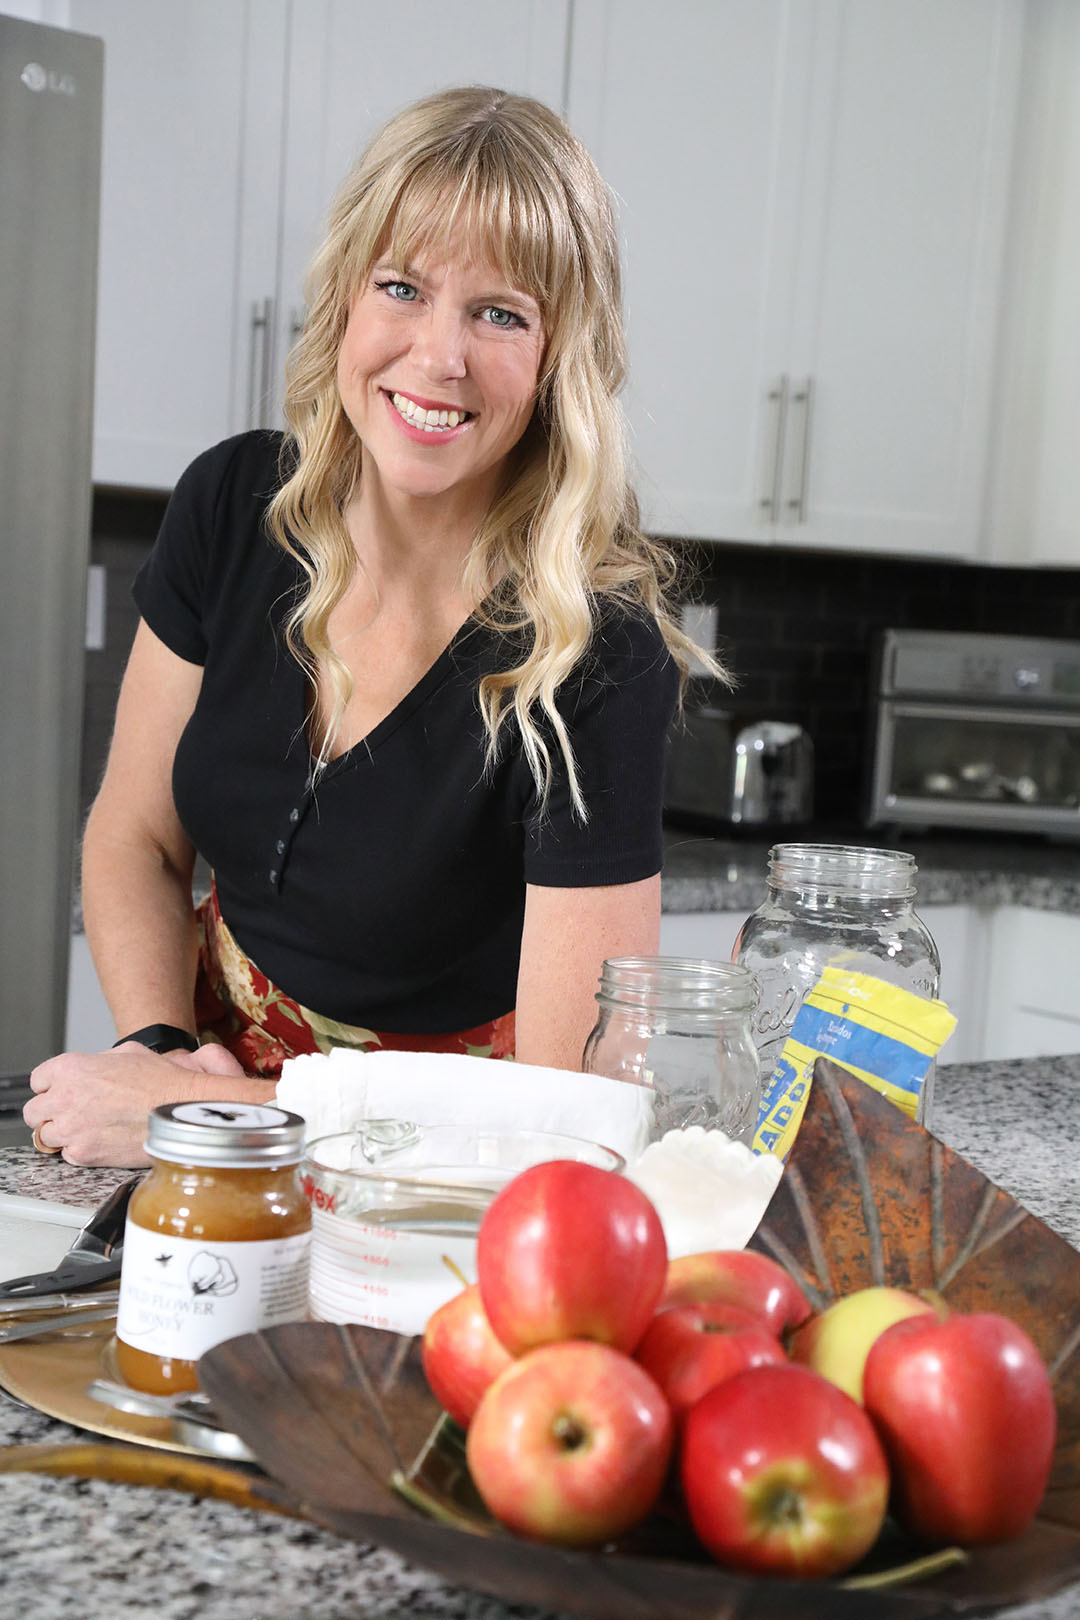
(courtesy of Carly Neubert, holistic nutritionist in Reno. Makes 8 cups)
3 organic apples, chopped (or 5 to 6 cups apple scraps, including seeds, core, skins)
4 to 5 cups filtered water, divided
4 to 5 tablespoons sugar or local honey* (Neubert uses local honey to support the immune system and prevent allergies. Note that if you use honey, it will take double the amount of time to ferment)
Optional: You can add a splash (or 1 tablespoon) store-bought apple cider vinegar with the mother to inoculate your mixture with acetobacter and lactobacillus.
*1 tablespoon sugar/honey for every 1 cup water
If you want to skip exact measurements, fill your jar up halfway with apples. Then fill rest of jar with water/sugar mixture.
Supplies needed
64-ounce (8-cup) wide-mouth Mason jar
Coffee filter
Tea towel (optional)
Rubber band or twine
Apple corer (optional)
Knife
Measuring cup
Measuring spoon
Long metal spoon
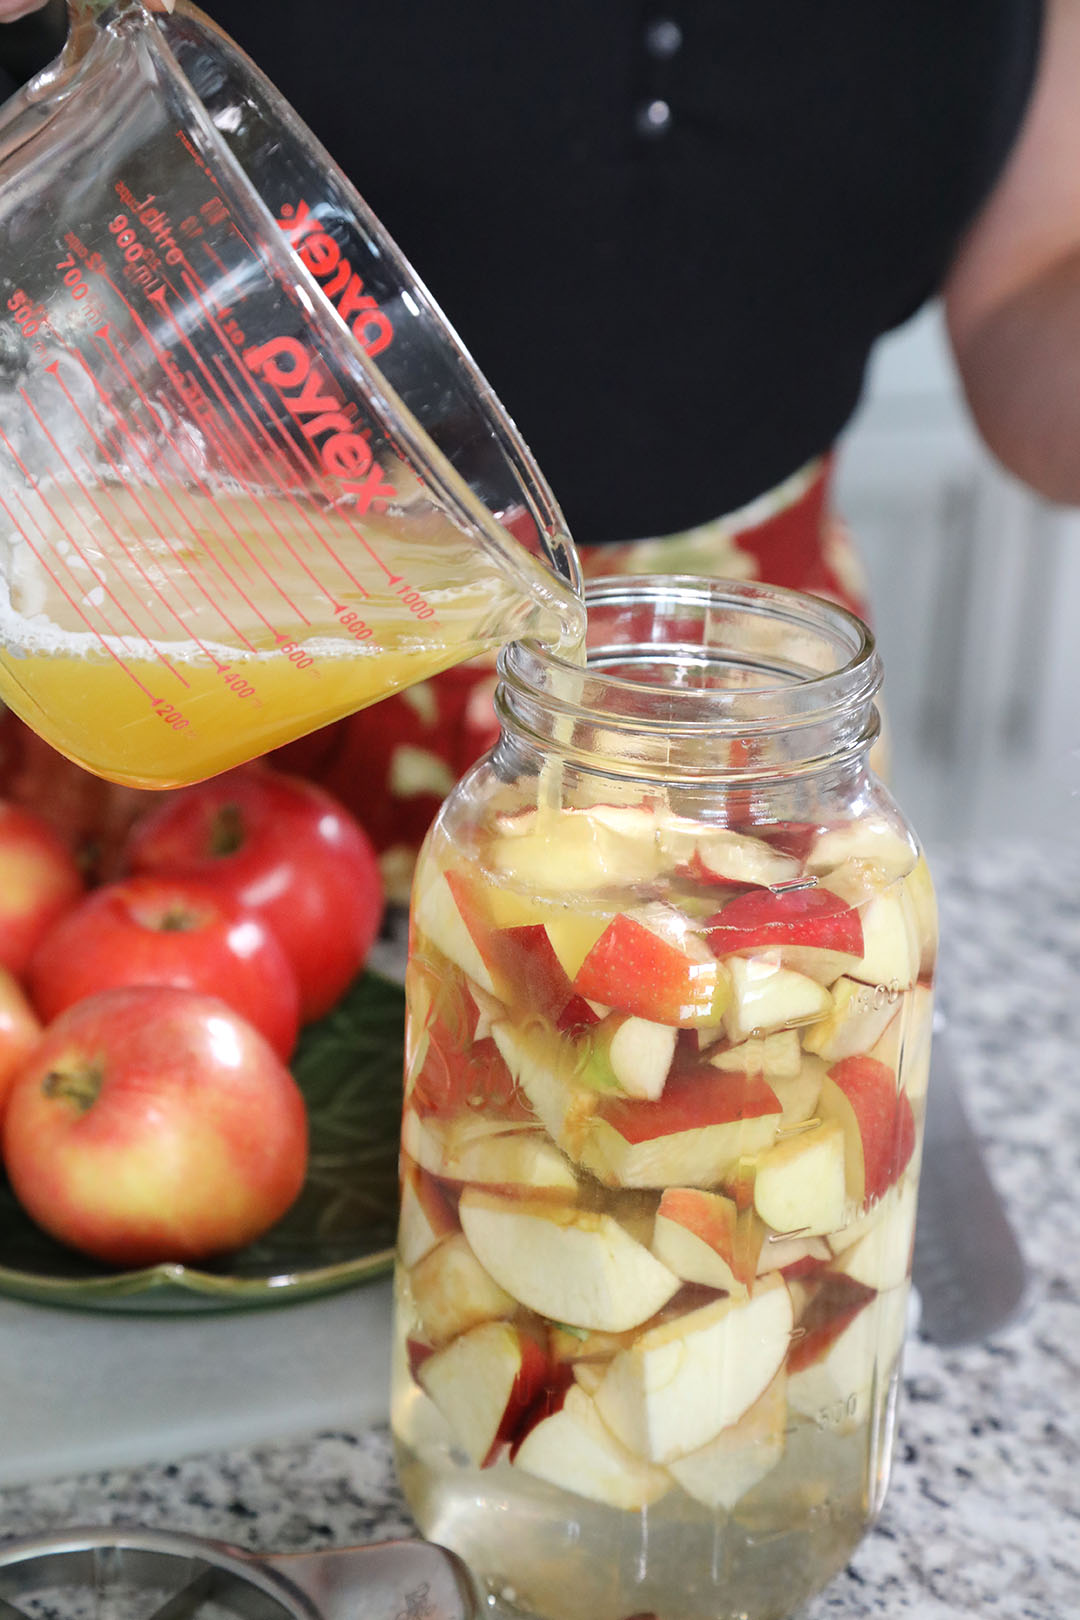
Prepare your water-sugar (or water-honey) mixture by mixing 4 tablespoons honey/sugar with 1 cup filtered water. Chop 3 organic apples, or prepare 5 to 6 cups organic apple scraps. If apples are not organic, peel them and discard peel. Add apple pieces to jar; they should fill it to about half.
Pour 3 cups filtered water apples in jar. Next, pour water-honey mixture into jar. Use long metal spoon to stir mixture. You will need to stir every day for the next 2 weeks.
Cover jar loosely with coffee filter fixed to top with rubber band or twine. Don’t use cheesecloth as small bugs and fruit flies can get through gaps in it.
Store in dark corner of your kitchen or inside a cupboard, or cover with a tea towel for about 2 weeks (or 4 weeks if using honey). Stir mixture with a metal spoon or swish the jar every day. The optimal temperature range for the fermentation process is 54 to 70 degrees F.
After 2 to 4 weeks, strain out apple solids and discard. Put remaining liquid back in same jar and place on countertop. Let sit for additional 2 to 4 weeks or longer.
You can smell and taste your apple cider vinegar to determine when it is done fermenting. Store your finished vinegar in the refrigerator because it is not pasteurized.
Make Your own Apple Cider Vinegar from Apple Juice
(Excerpted from Homebrewed Vinegar© by Kirsten K. Shockey. Used with permission from Storey Publishing)
1 gallon apple juice with no added preservatives
½ teaspoon wine yeast (or, in a pinch, baker’s yeast)
¼ cup unchlorinated water, heated to 104 degrees F
1 cup raw, unfiltered vinegar starter (make sure it is unpasteurized), or a vinegar mother
Fill a sanitized 1-gallon jar with juice, leaving about 2 inches of headspace.
If using wine yeast, hydrate the yeast by sprinkling it over the warm water in a cup. Stir gently, let sit for 20 minutes, then add hydrated yeast liquid to the jar and stir well.
Cover jar with a piece of unbleached cotton (butter muslin or tightly woven cheesecloth), or a basket-style paper coffee filter. Secure the cloth or filter with a string or rubber band, or the screw on the jar ring. This is to keep out fruit flies.
Place in an environment where the temperature is between 55 and 65 degrees F.
At 7 to 10 days, add vinegar starter. Replace cover on jar. Store on your counter or in another spot that is 75 to 86 degrees F. Over the next few weeks, a mother will likely develop. It is a cellulose film that grows on top.
Check the vinegar in a month, when you should have nice acidity. However, it may take an additional month or two to fully develop, especially if your environment is cooler.
Bottle finished vinegar in an airtight bottle. Save the mother for another batch or share it with a friend. Use vinegar immediately, or age to allow it to mellow and further develop flavor.
RESOURCES
Clean Coach Carly
8985 Double Diamond Pkwy., Ste. B8, Reno
800-626-7510 • Cleancoachcarly.com
The Fermentation School
Fermentationschool.com