cover
THE ART OF FERMENATION
Home fermenting is healthy, fun, and surprisingly easy.
WRITTEN BY SUE EDMONDSON
Fermentation may be trendy, but it’s nothing new. In fact, it’s extremely old. Chinese jars dating from 7000 B.C. contain remnants of a fermented beverage made from rice, honey, and fruit. That’s only a few millennia earlier than the bread and yogurt-like milk made in Egypt in 3000 B.C.
“A majority of the food we ate at one time was fermented. It’s one of the best ways to extend the shelf life of the summer harvest,” says Richie Bednarski, Reno anthropologist and avid fermenter. “Historically, fermentation has been part of culture worldwide. You could say it’s ingrained in our identity.”
Even now, foods first created through fermentation play a huge role in our daily diets. The ketchup spread on a hamburger bun: fermented. The cheese that tops the burger: fermented. Thinking of washing it down with a beer? It’s fermented, too. So are corned beef, soy sauce, vinegar, and wine.
What is fermentation?
Fruits, vegetables, and animal proteins decompose over time through a process that allows for little or no oxygen — or, as Merriam-Webster refers to it, “a chemical change with effervescence.”
The process is that simple. For many fermented items, fruits or vegetables are submerged in water, and sugar or salt is added. The jar is then covered and placed in a cool, dark place until the product is ready to eat or drink. Others require the addition of a starter to initiate the fermentation process. Most use little energy and have few ingredients.
Fermentation benefits
Apart from the sensory pleasure they offer, they can supply a healthy dose of probiotics. Lindsey Spitler, a certified nutritionist consultant and nutritional health coach at Natural Grocers in Reno, is a fan of fermented products for that reason.
“It’s why those foods are so fantastic,” she says. “Research shows that probiotics are important for body composition, digestion, our immune systems, and even brain function. It’s believed they help rid the body of an overgrowth of unhealthy bacteria. Fermented foods are the best way to get the greatest diversity of probiotics.”
One of several studies cited by the U.S. National Center for Biotechnology Information on probiotics confirms they’re most often consumed in fermented foods. It concludes, “Recent scientific investigation has supported the important role of probiotics as a part of a healthy diet for humans, as well as for animals, and may be an avenue to provide a safe, cost-effective, and ‘natural’ approach that adds a barrier against microbial infection.”
Why make your own?
Home producers are united in the sentiment that the food they make themselves is superior in taste and quality.
Then there are the health benefits. Many store-bought fermented goods lack the probiotics and enzymes found in homemade products. That’s because they’ve been pasteurized, and the heat used during pasteurization destroys beneficial bacteria.
Finally, there’s the geeky science factor. It’s what got Reno resident Leah Madison making vinegar and Reno resident Jeff Bryant brewing beer.
“I was making kombucha and got behind, and it turned to vinegar,” Madison says. “That made me curious about how everyday items are made, and that was the beginning of my interest in vinegar.”
“The science and chemistry involved in brewing beer are fascinating,” Bryant says. “There are all these moving parts that need to be tweaked. It’s easy to ‘nerd out’ on experimenting.”
Adults aren’t the only ones intrigued by the science of fermentation. When Reno resident Kelsey Hoffman teaches children to make kimchi during the summer Farm Camp for youths at Urban Roots, the bubbling that occurs during the process is the main attraction.
“It’s pretty easy to ferment food,” says Tom Stille of River School Farm in Reno. “But there can be failures, so be prepared. You’ll know immediately if things went wrong by the smell. It will really stink!”
Ferment vegetables
Just about any vegetable can be fermented. All you need is water; salt (sea, kosher, or pickling); your vegetable(s) of choice; seasonings of your choice; a covered jar; a cool, dark place for storage; and patience — the process can take several days to many months. Fermentation is not to be confused with pickling, which uses vinegar, pressure, and heat to preserve. While pickled foods may be ready faster, they lack the probiotics created during fermentation.
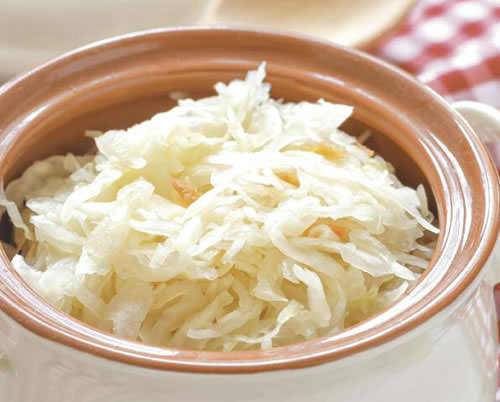
Tom and, his wife, Iris Stille, ferment just about anything from the gardens at River School Farm. One of Iris’ favorites uses cabbage to make the sauerkraut she’s eaten since childhood.
“All you need is cabbage, sea salt, and a crock or mason jar,” she says. “Grate the cabbage, put it in the crock, then press on the cabbage until it’s completely submerged in its own juice. Add salt — a couple of tablespoons per cabbage. You can also add spices such as caraway, or an apple. Put the lid on and leave it in a dark place with temperatures around 60 to 70 degrees (F). It’s critical to make sure the cabbage stays submerged, so check on it weekly. Depending on the temperature, it usually takes about four weeks to complete the process. It will last all winter in the crock if you manage it correctly, or you can refrigerate it.”
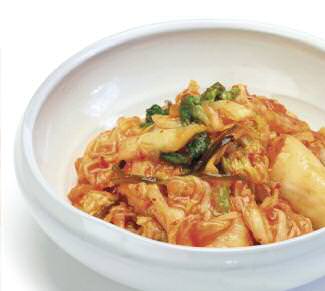
“Kimchi is made the same way,” Tom says. “It’s basically an Asian variation of sauerkraut. Let it sit a couple of weeks until you’re satisfied with the taste, and then refrigerate it.”
In kimchi, Napa cabbage takes the place of green cabbage. Daikon radishes, ginger, scallions, red pepper flakes, and garlic add the spiciness that makes kimchi so popular.
“There’s no right way to make kimchi,” he adds. “In Asia, each community has its own recipe handed down through the generations.”
Create vinegar
“Vinegar is the easiest thing in the world to make and it has so many uses,” Madison says. “It’s great for upset stomachs and sore throats.”
Fruit-based vinegar requires a starter, known as “the mother.” Madison makes hers from organic, unpasteurized vinegar, but says first-timers can buy starter from a brewers’ supply store. The only other supplies required are a glass or ceramic jar, cheesecloth, a rubber band, water, and fruit. Any high-sugar fruit will work; add a little sugar if the fruit is tart.
“To make vinegar, bruise the fruit, cover with water, then put the cheesecloth over the mouth of the jar and secure it with the rubber band,” Madison says. “Put the jar in a dark place with temperatures between 60 and 80 degrees (F). Then you can forget about it for a couple of months. When you check on it, look for bubbles. The fewer the bubbles, the closer it is to vinegar. The sediment on top is the mother. When you like the taste, remove the mother and save it for your next batch. Then strain the vinegar, pour into a bottle, and refrigerate. It looks funky when it’s fermenting, but once it’s strained, it looks normal.”
Alcohol-based vinegar requires even less work, and adding a starter is optional.
“If you have any wine, beer, or hard cider sitting around, pour it into a jar, cover the top with the cheesecloth, and let it sit in a cool, dark place,” Madison says. “How easy is that?”
Slow-cooker yogurt
Jessica Locke wanted to make yogurt, but wasn’t interested in shelling out the money for a machine. That’s when she decided to pull out her slow cooker.
“I love my Crock-Pot,” she says. “It doesn’t heat up the house in the summer and it’s the most convenient way to cook.”
While making slow-cooker yogurt requires a block of time, the process is simple. Pour half a gallon of milk into the slow cooker, cover it, and set it to low for two and a half hours. Then turn it off and let it sit for three hours. Scoop out a couple of cups of milk, mix with half a cup of plain yogurt, put it all back in the slow cooker, and stir. Turn the slow cooker to warm for 30 minutes, then unplug it, wrap it in a towel, and leave it for eight hours or overnight. Then spoon the contents into a bowl and refrigerate it. Locke adds flavorings such as local honey or fruit at the time of serving.
“Everyone has a slow cooker,” she says. “You don’t need fancy equipment to make great yogurt.”
Making sourdough
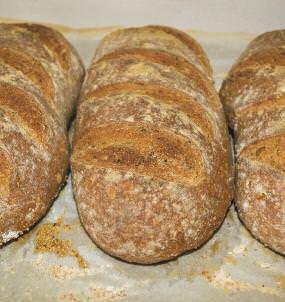
Bednarski’s nickname is “Mr. Sourdough,” and for good reason. He’s been baking it weekly for years. Not only does he appreciate that sourdough is easier to digest than breads that have shorter fermentation times, but he also enjoys the process.
“Making bread is almost like a meditation for me. I could do it with my eyes closed,” he says. “It’s a slow food that fits into the modern lifestyle. You can take a break from preparation while you go to work.”
His recipe (provided below) has measurements in grams, and he uses a kitchen scale for precision.
“It is the best way to ensure consistent and stellar bread,” he says.
Brew beer
“The thing that’s so fun about it is that you basically have four ingredients — malted barley, water, yeast, and hops — and you can make so many variations,” Bryant says about brewing beer. “But it requires equipment and can take four to six hours to make a five-gallon batch.”
Beginners might want to start with store-bought kits and talk with brewers about the process.
“There is quite a bit to know,” Bryant says. “I’ve been making it for years and I’m still learning.”
Preserve culture
“People have been celebrating with fermented foods throughout history,” Tom Stille says. “We keep those traditions alive.”
Freelance writer Sue Edmondson writes for various Nevada and California publications. She wishes she’d known about slow-cooker yogurt before investing in a yogurt maker.
Fermentation Resources
Books
Fermented Foods for Health by Deirdre Rawlings
Mastering Fermentation by Mary Karlin
Brewers’ supplies
Reno Homebrewer, 2335 Dickerson Road, Reno, 775-329-2537
BrewChatter, 1275 Kleppe Lane, Ste. 21, Sparks, 775-358-0477
Classes, recipes, and more
http://www.Organiclifestyle.net (click on Sauerkraut and Fermented Foods)
http://www.Nvandw.com (connect with home winemakers through Nevada Vines & Wines)
Recipes
Kid-Friendly Kimchi
(courtesy of Kelsey Hoffman and Urban Roots in Reno. Makes 2 quarts)

1 head Napa cabbage, chopped
2 daikon radishes, grated
¼ cup salt
Ginger root, grated, to taste
4 to 5 cloves garlic, minced
Red pepper flakes or paste, to taste
Green onions or chives, minced, to taste
6 small carrots, grated
Fennel seed, crushed, to taste
Salt and pepper, to taste
“For fun, we add chard leaves and stalks and baby cabbage leaves, massaged and torn up by the kiddos,” Hoffman says.
Place chopped cabbage in large bowl and massage with salt to extract juices. Cover cabbage with water for 30 minutes, making sure cabbage remains submerged. Rinse cabbage three times and return to bowl.
Add in all other ingredients and massage together. Continue massaging until all ingredients are submerged in their own juices.
Place in airtight container, pressing ingredients below brine. Refrigerate. Taste every few days until it’s fermented to your liking, pressing ingredients under the brine each time. Best eaten after two weeks in fridge but can be eaten immediately.
Sourdough Daily Bread
(courtesy of Richie Bednarski. Makes 2 loaves)

400 grams bread flour
200 grams whole-wheat flour
350 grams filtered water
200 grams active liquid starter
15 grams salt
Combine flours and whisk together. Combine water and starter, whisk for about one minute. Add flour to starter/water mixture and stir until water is absorbed and dough is shaggy. Cover and let rest 30 minutes.
Add salt to dough and stretch and fold like business letter two to three times, rotating 90 degrees after each set of folds. Repeat every 30 minutes for total of five stretches/folds. Place in bowl, cover (dish towel or plate over top of bowl works well), and let rest for one to two hours. You may also cover with plastic wrap and refrigerate for up to 12 hours at this stage, or proceed to next stage.
Divide dough evenly and shape into two loaves. (There are sourdough bread-shaping videos online). You may cover the loaves with plastic wrap and refrigerate for up to 10 hours at this stage (it’s OK to refrigerate for a second time), or continue to next stage.
Let loaves rest for two to four hours. If dough or loaves were refrigerated, add an additional one to two hours’ resting time.
One hour before baking, preheat oven to 500 degrees F. Place metal bread pan on one side of oven.
Loaves are proofed (ready to bake) when a light touch makes an indent that does not bounce back. Place bread on baking sheet. Make three or four diagonal slices across tops of loaves to allow for even rising.
Carefully pour two to three cups of boiling water into hot bread pan and put bread into oven.
Turn down heat to 400 degrees F and bake for 45 to 50 minutes. Bread is done when browned and a hollow thump sounds on the bottom. Cool for one hour and enjoy.
Sourdough Starter (The Mother)
½ cup organic whole rye flour
½ cup filtered water
Combine and stir well. Let sit for six to eight hours. Pour off half of mixture and repeat first step. Do this for five to seven days until mixture starts bubbling. This is when you know you have cultivated enough wild yeast for bread making. Refrigerate for storage. Starter should be fed every two to three weeks minimum, by following steps below. Once starter is active, you may use whole-wheat flour.
Feeding
Pour half of starter from mother into bowl. This is ready for bread. To make additional starter, add ½ cup each water and flour of your choice to mother. Refrigerate. Every six to eight hours, add ½ cup each water and flour, stirring well, until you have enough active starter for chosen recipe.


