tips and tricks
DIY SMOKER
A beginner’s guide to building an outdoor meat cooker.
WRITTEN BY HEIDI BETHEL
PHOTOS BY ASA GILMORE
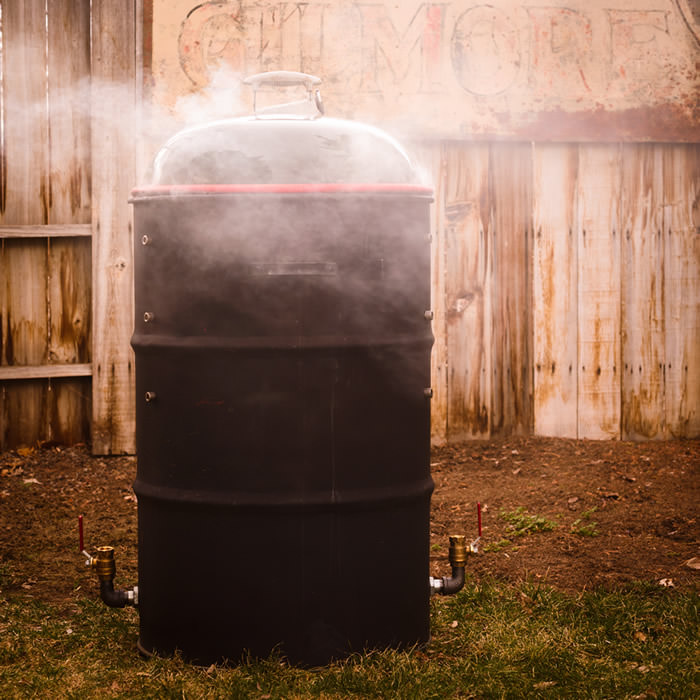
It wouldn’t be summertime without the smell of barbecue wafting through the air. The warm weather and long, leisurely days make it appealing to get outside and take on a do-it-yourself project — when it comes to meat that could mean barbecuing ribs all day with your own homemade sauce or building a smoker from scratch. While many cooking techniques capture those can’t-beat summertime flavors, one tool favored by many is the almighty smoker. With a little skill, supplies available at local hardware stores, and simple instructions, enthusiasts can create the cooking masterpiece dubbed the “ugly drum smoker.”
Joe Orduna, owner of Brothers Barbecue in Reno, raves about the craft.
“Smoking meat is arguably the ultimate way to cook outside,” he says. “It allows anyone, amateur or professional, the opportunity to turn large, less-desirable cuts of meat into a deliciously tender masterpiece. Smoking not only helps preserve meat, but the low-and-slow process allows the connective tissue — which typically makes a large cut of meat tough — the chance to break down.”
Backyard grill master
Photographer and grill master-in-his-own-backyard Asa Gilmore always has held a fondness for smoked meats. He spent some time tinkering with an ugly drum smoker.
“This is a fairly economical and easy way to cook some amazing meats and vegetables,” Gilmore says. “It will definitely result in people peeking over the fencepost to see what you’re up to.”
To start, Gilmore suggests purchasing a 55-gallon steel drum and blistering off the paint and any interior liner with a really hot fire.
“Mine had finish on the inside and outside,” he says. “You need to remove all of that and get it down to bare metal in order to meet food-grade cooking standards.”
Next comes the seasoning. Smear the inside with lard and light a cooler fire. Let that smolder for about 30 minutes to provide a base coat of heat-conducting goodness. Then, paint the exterior of the drum with a high-heat-tolerant paint to make the ugly drum smoker … well, a little prettier.
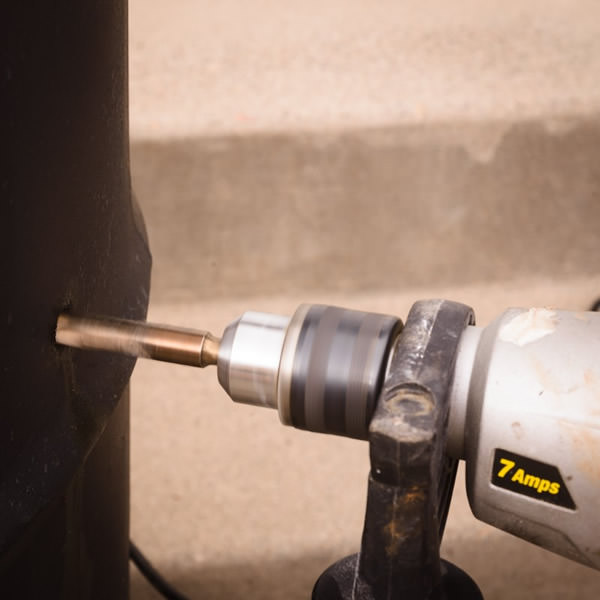
Once the drum is seasoned, cool, and dry, drill holes around the base and strategically up the sides for the intake control and stainless- or raw-steel hardware placement that will hold grilling grates. Gilmore employs a valve system that he uses for air intake, but there are other options. He recommends talking to the pros at Ace Hardware and Twin City Surplus in Reno to see what works best.
For the heating mechanism, Gilmore uses a smaller charcoal grate lined with expanded steel mesh, metal fasteners, and bolt legs. He assembles a basket to contain the fiery wood pieces. Top it off with the lid that comes with the drum, or find a used Weber charcoal grill lid that fits snugly.
Smoked to perfection
Jay Rathmann, owner at BJ’s Nevada Barbecue Co. in Sparks, recommends using many varieties of wood, ranging from mesquite to cherry, peach, pecan, and apple to pair with the meats. He suggests starting with a rub-coated, bone-in pork butt cooked inside a foil pan.
“Dry rubs are fantastic,” Rathmann says. “You can tinker with the recipe and really make it your own to highlight whatever meat you’re using. The pan catches all of the good juices to keep the meat moist.
“Bone-in pork butt brings a lot of flavor,” he says. “If you’ve ever watched one of the barbecue shows on TV, you see them pull the bone right out, and it’s perfectly clean. That’s when you know it’s done. And delicious.”
Heidi Bethel is a longtime lover of smoked meats who was drooling over the fantastic smells coming from Gilmore’s DIY smoker. She encourages folks to also try their hands at grilling chicken, seafood, and veggies in their own ugly drum smokers.
Recipes
Dry-Rubbed, Smoked Pulled Pork Butt
(courtesy of Jay Rathmann, owner, BJ’s Nevada Barbecue Co. in Sparks. Serves 10 to 12)
7- to 9-pound pork butt
1¾ cups Basic Barbecue Rub (see below)
Using shaker bottle or by hand, coat entire pork butt evenly with barbecue rub. Place pork butt in disposable 13-by-10-by-2.5-inch aluminum pan and set inside smoker. Smoke between 200 and 250 degrees F for 12 to 18 hours. Depending on type of smoker being used, covering pork butt with aluminum foil after 5 hours may help pork retain moisture and control amount of smoke put into meat. Alternatively, put pork butt in smoker for 4 to 5 hours, then place in oven at 225 degrees F with foil on top for remaining time. When bone pulls out of butt cleanly with little resistance, it is done.
Basic Barbecue Rub
(courtesy of Jay Rathmann, owner, BJ’s Nevada Barbecue Co. in Sparks)
1 cup brown sugar
1 cup white sugar
1 cup kosher or sea salt
¼ cup black pepper (16 mesh)
¼ cup smoked paprika
1 tablespoon granulated garlic
Place all ingredients in mixing bowl and whisk until combined.
Pulled Pork Spring Rolls with Dipping Sauce
(courtesy of Asa Gilmore. Serves 4)
1 package spring roll rice paper wrappers
3 cups pulled pork
1 pineapple, thinly sliced
2 avocados, pitted and thinly sliced
2 cups red cabbage, thinly sliced
3 cups cilantro
Place rice paper wrapper in pan of hot water and remove just as it starts to soften. Hold wrapper in palm of your hand as you assemble roll. Place pork, pineapple, avocado, cabbage, and cilantro on wrapper. Fold in sides and roll tight from bottom to top. Serve with dipping sauce (see below).
For dipping sauce
⅓ cup fish sauce
2 tablespoons white vinegar
2 tablespoons lime juice
1 tablespoon sugar
1½ tablespoons Sriracha sauce
2 garlic cloves, pressed
Mix together ingredients.
Smoked Beef Brisket
(courtesy of Joe Orduna, owner, Brothers Barbecue in Reno. Serves 16 to 20)
12- to 14-pound beef brisket
⅓ cup kosher salt
⅓ cup freshly ground black pepper
⅓ cup Brothers Barbecue house rub
Trim off any really hard pockets of fat on brisket, but don’t trim too much because fat will help keep meat moist during cooking process. Rub brisket with salt, pepper, and rub. Place it on smoker at 220 degrees F using combination of apple and mesquite woods. You’ll be tempted to look at it every 30 minutes, but don’t; you’ll let out heat and smoke. Be patient, as this process takes 8 to 12 hours.
After brisket has been in smoker for 4 hours, check on it. If heat source is too hot and brisket looks like it might be cooking too quickly, wrap it in foil for last couple of hours. Once it reaches an internal temperature of 185 to 190 degrees F (easily determined if tip of sharp knife slides into brisket with little to no resistance), brisket is finished. Let meat rest for about 30 minutes. Slice and serve with Brothers Barbecue sauce. Or chop brisket for sandwiches and share with friends and family.
Resources – Step by Step – How to Build Smoker
Parts List:
1 55-gallon food grade drum
1 22.5″ weber grate (more grates can be installed, but you need at least one)
4 1/2-13×1-1/2 stainless steel bolts and nuts for the desired number of grates
1 Weber grill lid or the lid that comes with the drum
1 thermometer (a dial thermometer is fine, but a wireless one with two leads for smoker temp and internal meat temp is very handy)
Vent materials (this is for two vents, if you’re using the standard drum lid you may want to install two more additional vents at the top)
2 3/4″ ball valves
2 90-degree threaded pipe
2 3/4×1.5″ threaded nipple
2 3/4″ pipe nuts
Materials for fire basket:
1 piece 10″x48″ expanded steel mesh
1 small Weber grill grate for coals
4 3/8 16×5 bolts and two nuts for each
3 1/4-20x.5 bolts, nuts, and washers
1 14.5″ Weber grate
Supplies:
2 cans high-temperature paint, either grill paint or automotive header paint
Lard (for seasoning the inside)
Tools:
Electric drill and appropriate bits for the bolt holes
A propane torch is handy to start the fire
A couple of crescent wrenches to tighten the assorted bolts
Step-by-step Instructions
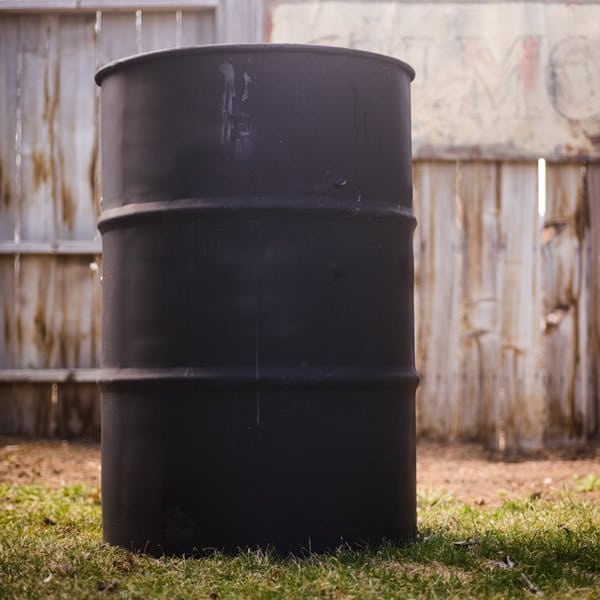
1. Acquire a food-grade steel drum from Twin City Surplus or any other hardware source.
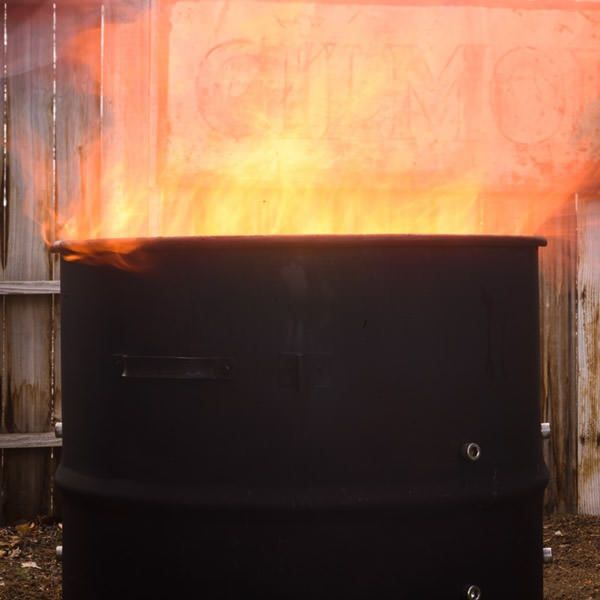
2. Remove drum finish. Even food-grade finish is not acceptable for smoking. The barrel needs to be taken down to bare metal. You can do this with a sand blaster or wire wheel, but the most efficient method is lighting a hot fire inside. This blisters the exterior paint and removes the interior finish on the barrel. Once the barrel is down to bare metal, smear the inside with lard and light another (cooler) fire to season it. Paint the exterior with high-temp grill paint or exhaust paint. Exhaust paint has a higher temperature resistance and is not in contact with food.
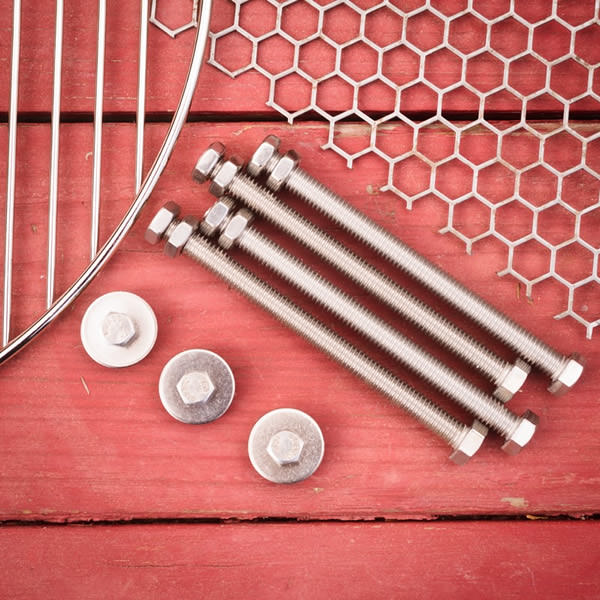
3. You’ll need an assortment of bolts and hardware for the fire basket. Note: ALL hardware for smoker should be stainless or raw steel.
Materials list for fire basket:
1 piece 10”x48″ expanded steel mesh
1 small Weber grill grate for coals
4 3/8 16×5 bolts and two nuts for each
3 1/4-20x.5 bolts, nuts, and washers
1 14.5″ Weber grate
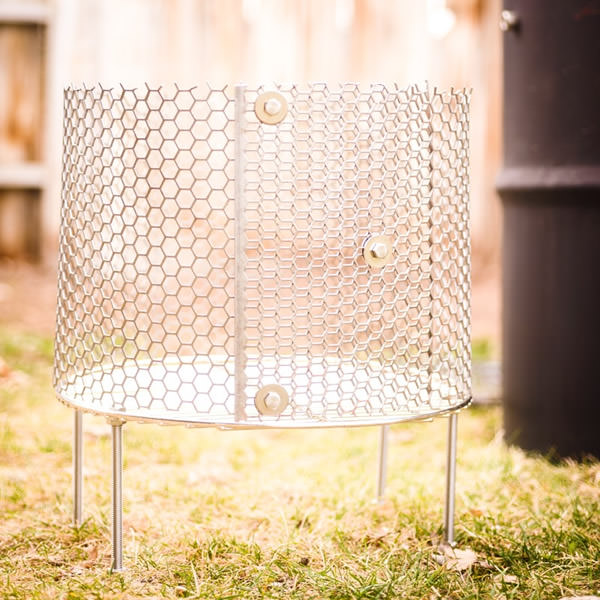
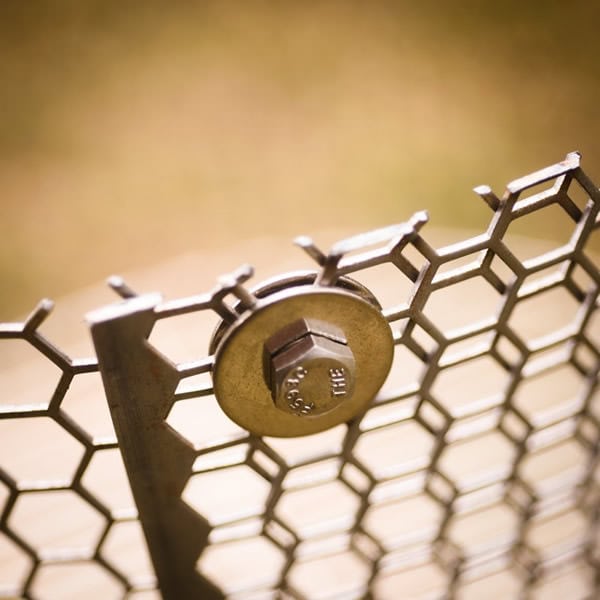
4. The finished fire basket. You may want to wire the outer wall to the base.
5. Drill holes for the grate support bolts. Use 4 1/2-13×1 1/2 stainless nuts and bolts for each grate. Weber 22.5″ grates fit perfectly inside the drum with this method.
6. The installed grate.
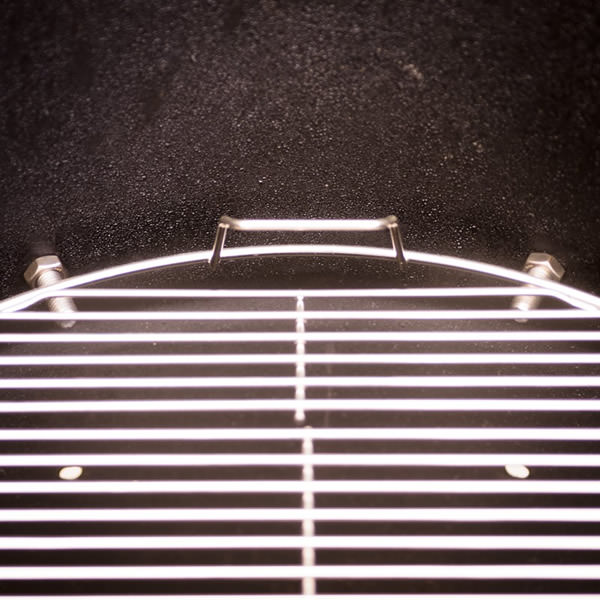
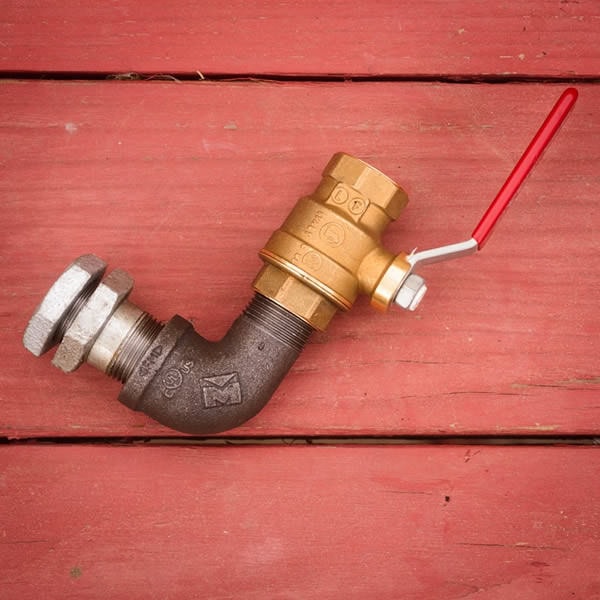
7. The lower vent. This valve without the 90-degree bend can also be installed as an upper vent if you don’t have a Weber top.
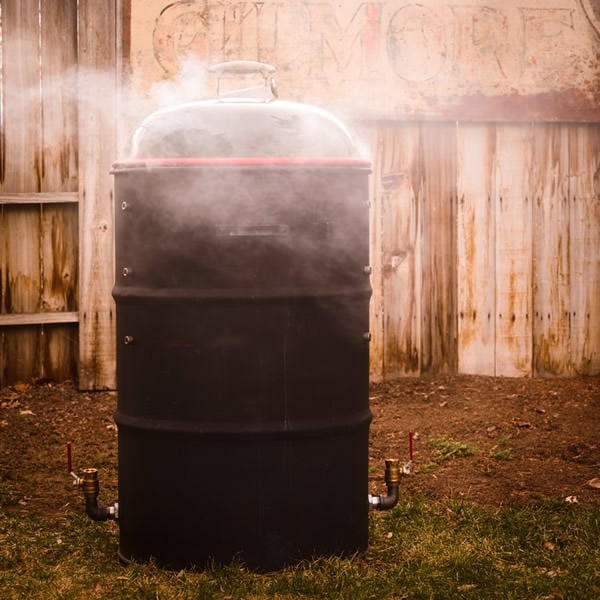
8. The finished smoker. Two lower vents, Weber top, firebox as described above, and three cooking grates spaced by six inches each.
